Topic: How To Remove Sheets From An Assembly
Author: OEMDocs
Created: 10/02/2024 04:24:42 UTC
Last Update: 10/02/2024 04:24:42 UTC
Summary
This documentation article demonstrates how to remove a Sheet from a Parts Catalog's Assembly within the TIPS Platform.
Removing a Sheet
Step 1
When you're logged into the TIPS application and on the home tab, open any Parts Catalog.
Once the parts catalog is open, the left panel will show all of the Assemblies that are currently used within the catalog.
Click on the Assembly where you want to remove a Sheet.
Then click on the Sheet # of # dropdown in the center image toolbar.
Then click on the Sheet you want to remove.
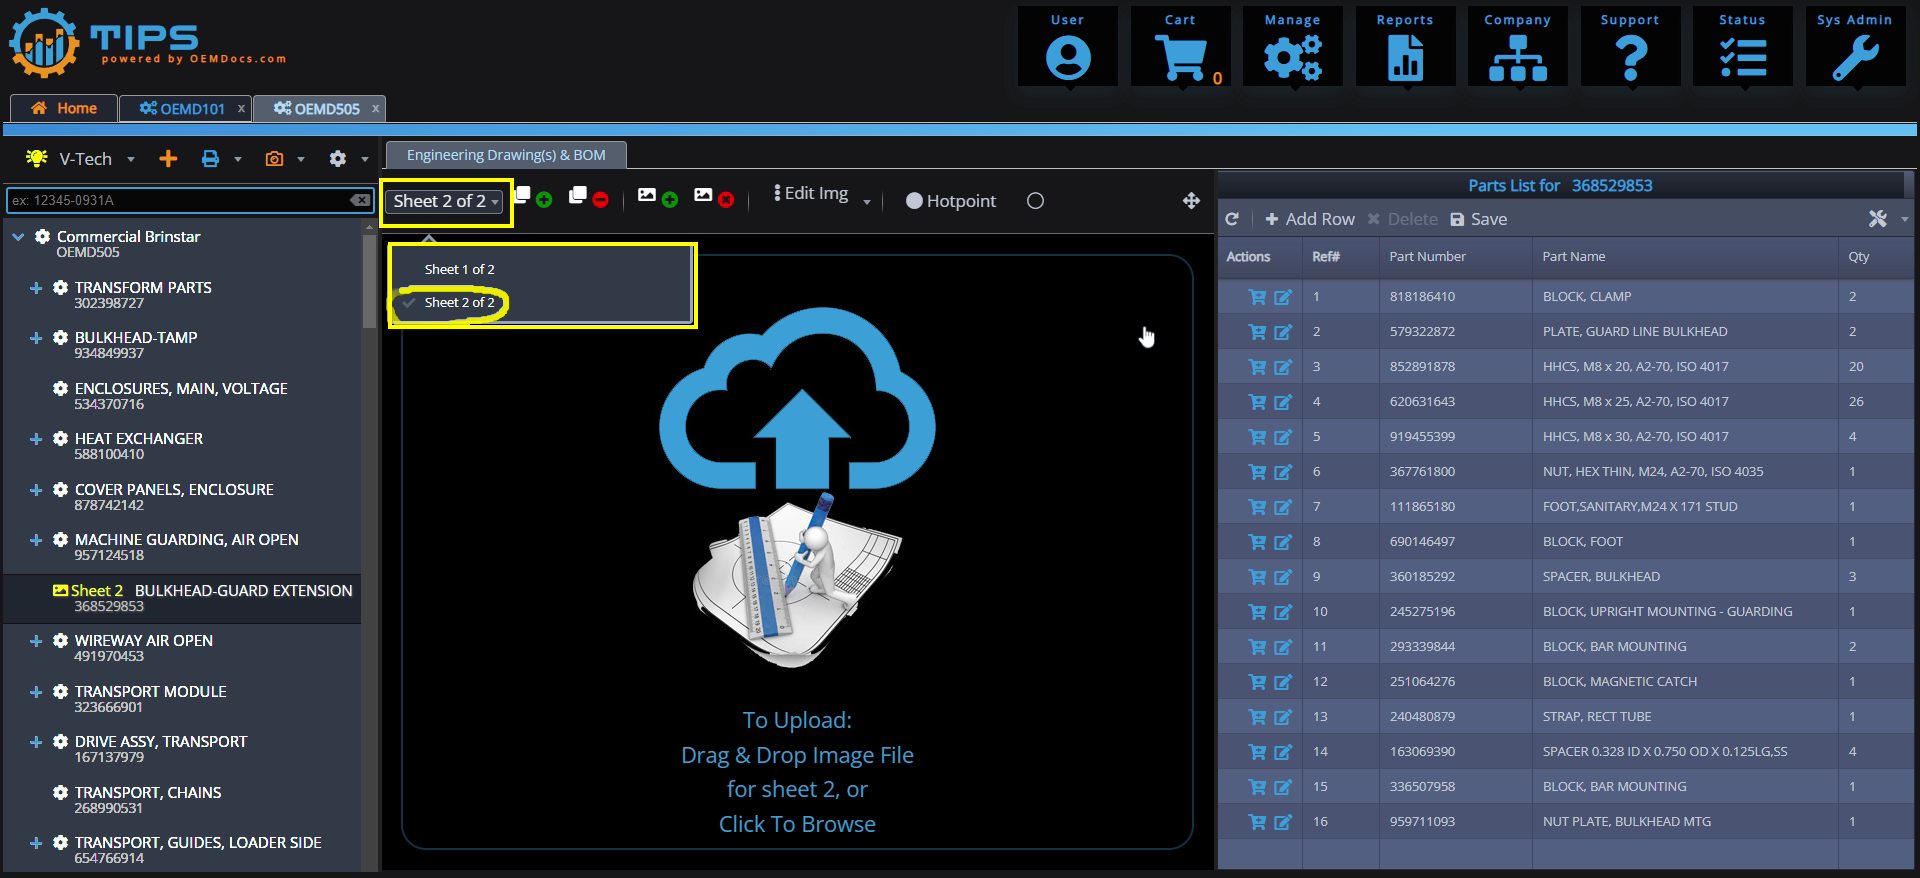
[click img to enlarge]
Step 2
The Sheet and any corresponding drawing will render into the center panel.
To remove the sheet, simply click on the Icon
Note that if the Sheet has a Drawing attached to it, removing the Sheet will also remove the drawing.

[click img to enlarge]